Automating Invoice Processing with Aquaforest PDF Connector for Power Automate
In today’s business landscape, the efficient processing of invoices is crucial for maintaining financial accuracy and ensuring timely payments. However, dealing with large PDF files containing multiple invoices can be a time-consuming and error-prone task. This user guide demonstrates how to leverage the Aquaforest PDF Connector for Power Automate, specifically the “Split PDF by Barcode” action, to automate the separation of invoices based on barcode values.
Challenges
Manual processing of invoices within large PDF files poses several challenges:
Time-Consuming: Separating and organizing individual invoices manually is time-consuming, especially when dealing with a high volume of documents.
Error-Prone: Manual separation increases the risk of errors in categorizing and assigning invoices to the correct processing workflows.
Lack of Efficiency: Traditional methods hinder the efficiency of accounts payable processes, leading to delays in payment cycles.
Aquaforest PDF Connector: "Split PDF by Barcode" Action
The Aquaforest PDF Connector for Power Automate introduces a powerful action called “Split PDF by barcode,” designed to address the challenges associated with invoice processing. This action utilizes barcode values embedded in PDF files to automate the splitting of the PDF into individual invoices. Moreover, it allows the generation of customized file names for the split files based on the extracted barcode values.
How to Split PDFs by barcode using Power Automate
Follow these step-by-step instructions to implement the “Split PDF by barcode” action:
Step 1. Configure Aquaforest PDF Connector.
Add the Aquaforest PDF Connector to your Power Automate workflow. First you choose the type of the flow and the trigger.
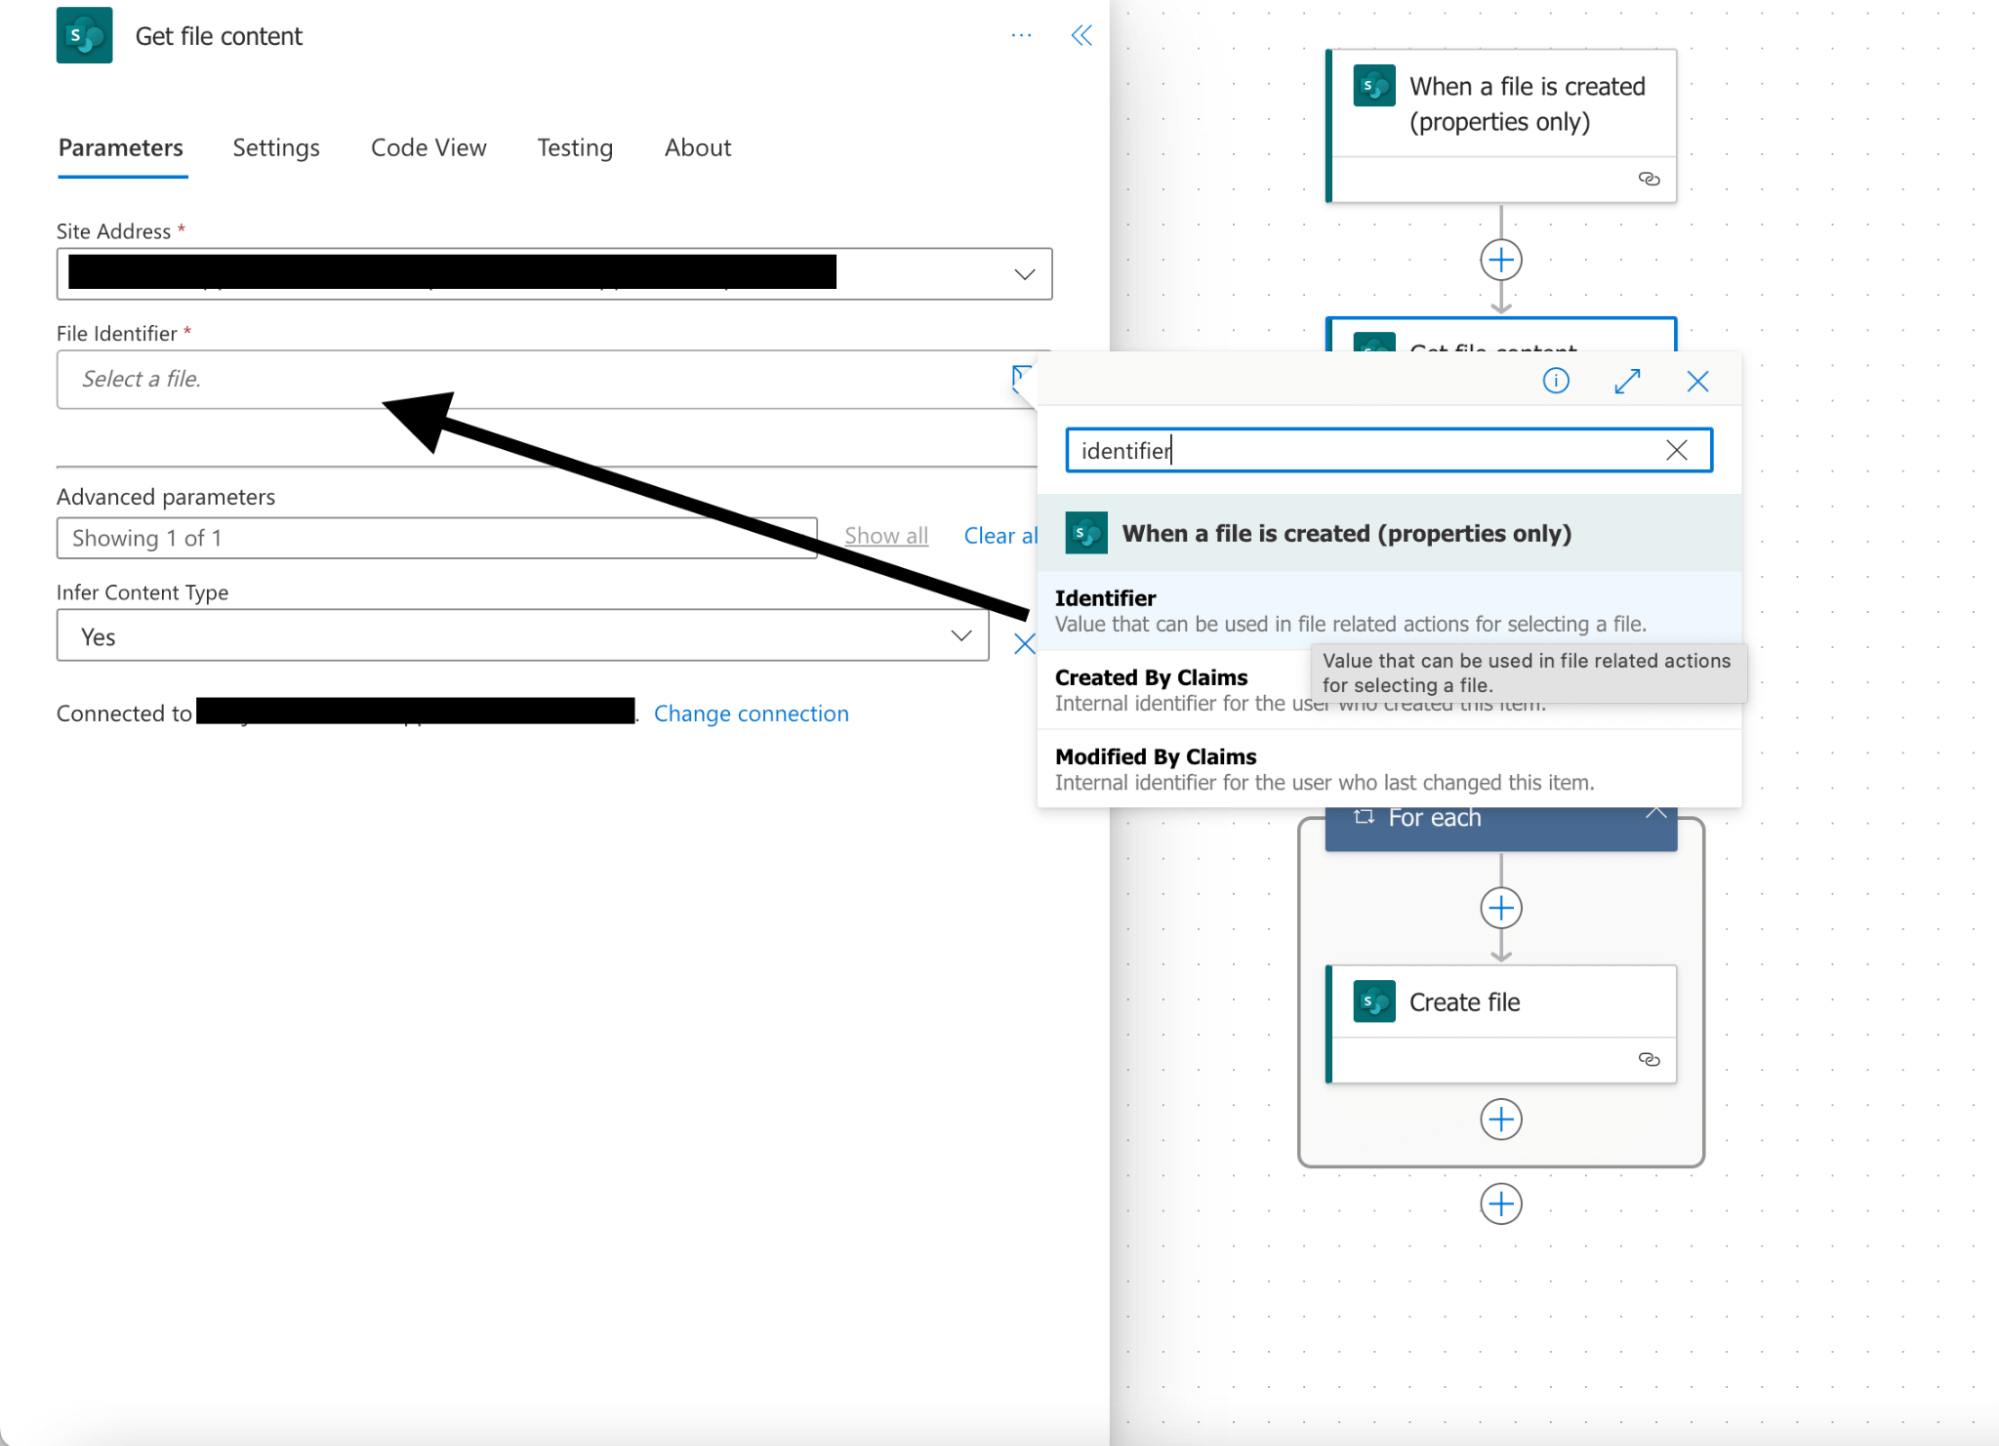
For this example, we will choose the “Automated cloud flow” and set a trigger “When a file is created (properties only)”. This trigger is activated when an item is created, or modified in a library. As it returns only the properties stored in the library columns you need to add a “Get file content” step and use the “Identifier” property returned by this action to get to the contents of the file.
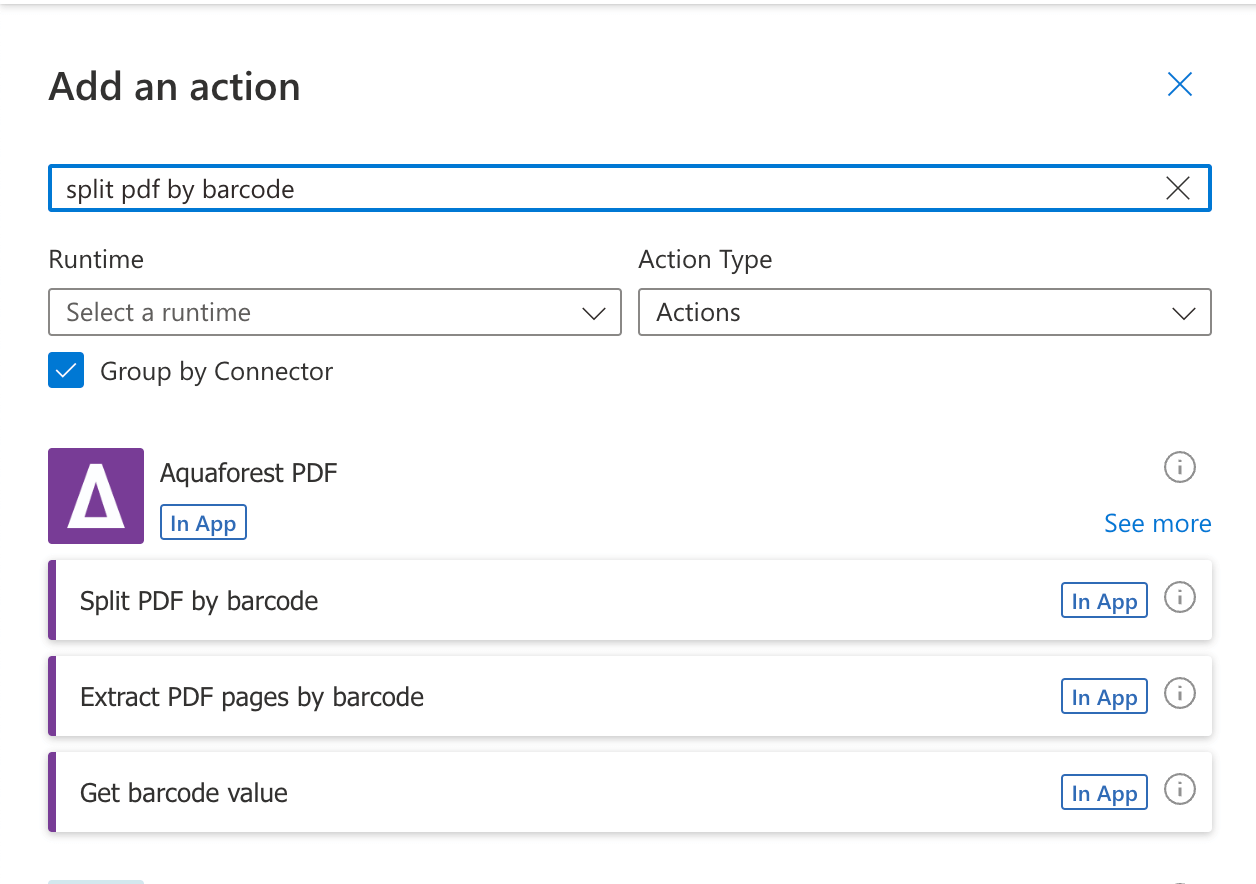
Click on the + button to add a new action, and in the search bar type “Split PDF by Barcode” action.
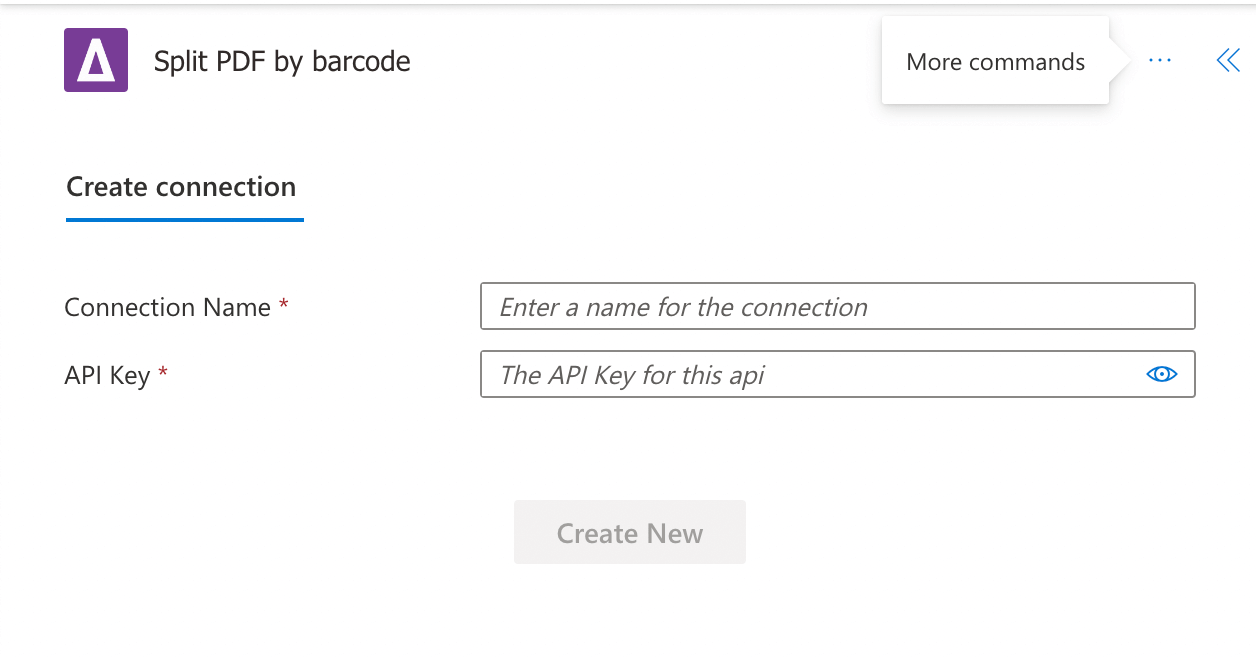
As a next step, you will be asked for a Connection Name and an API Key. Give your connection a name and use the primary key generated upon signing up for PDF Connector. If you need assistance, read the getting started guide, particularly Generate API key section.
Step 2. Provide Input Parameters.
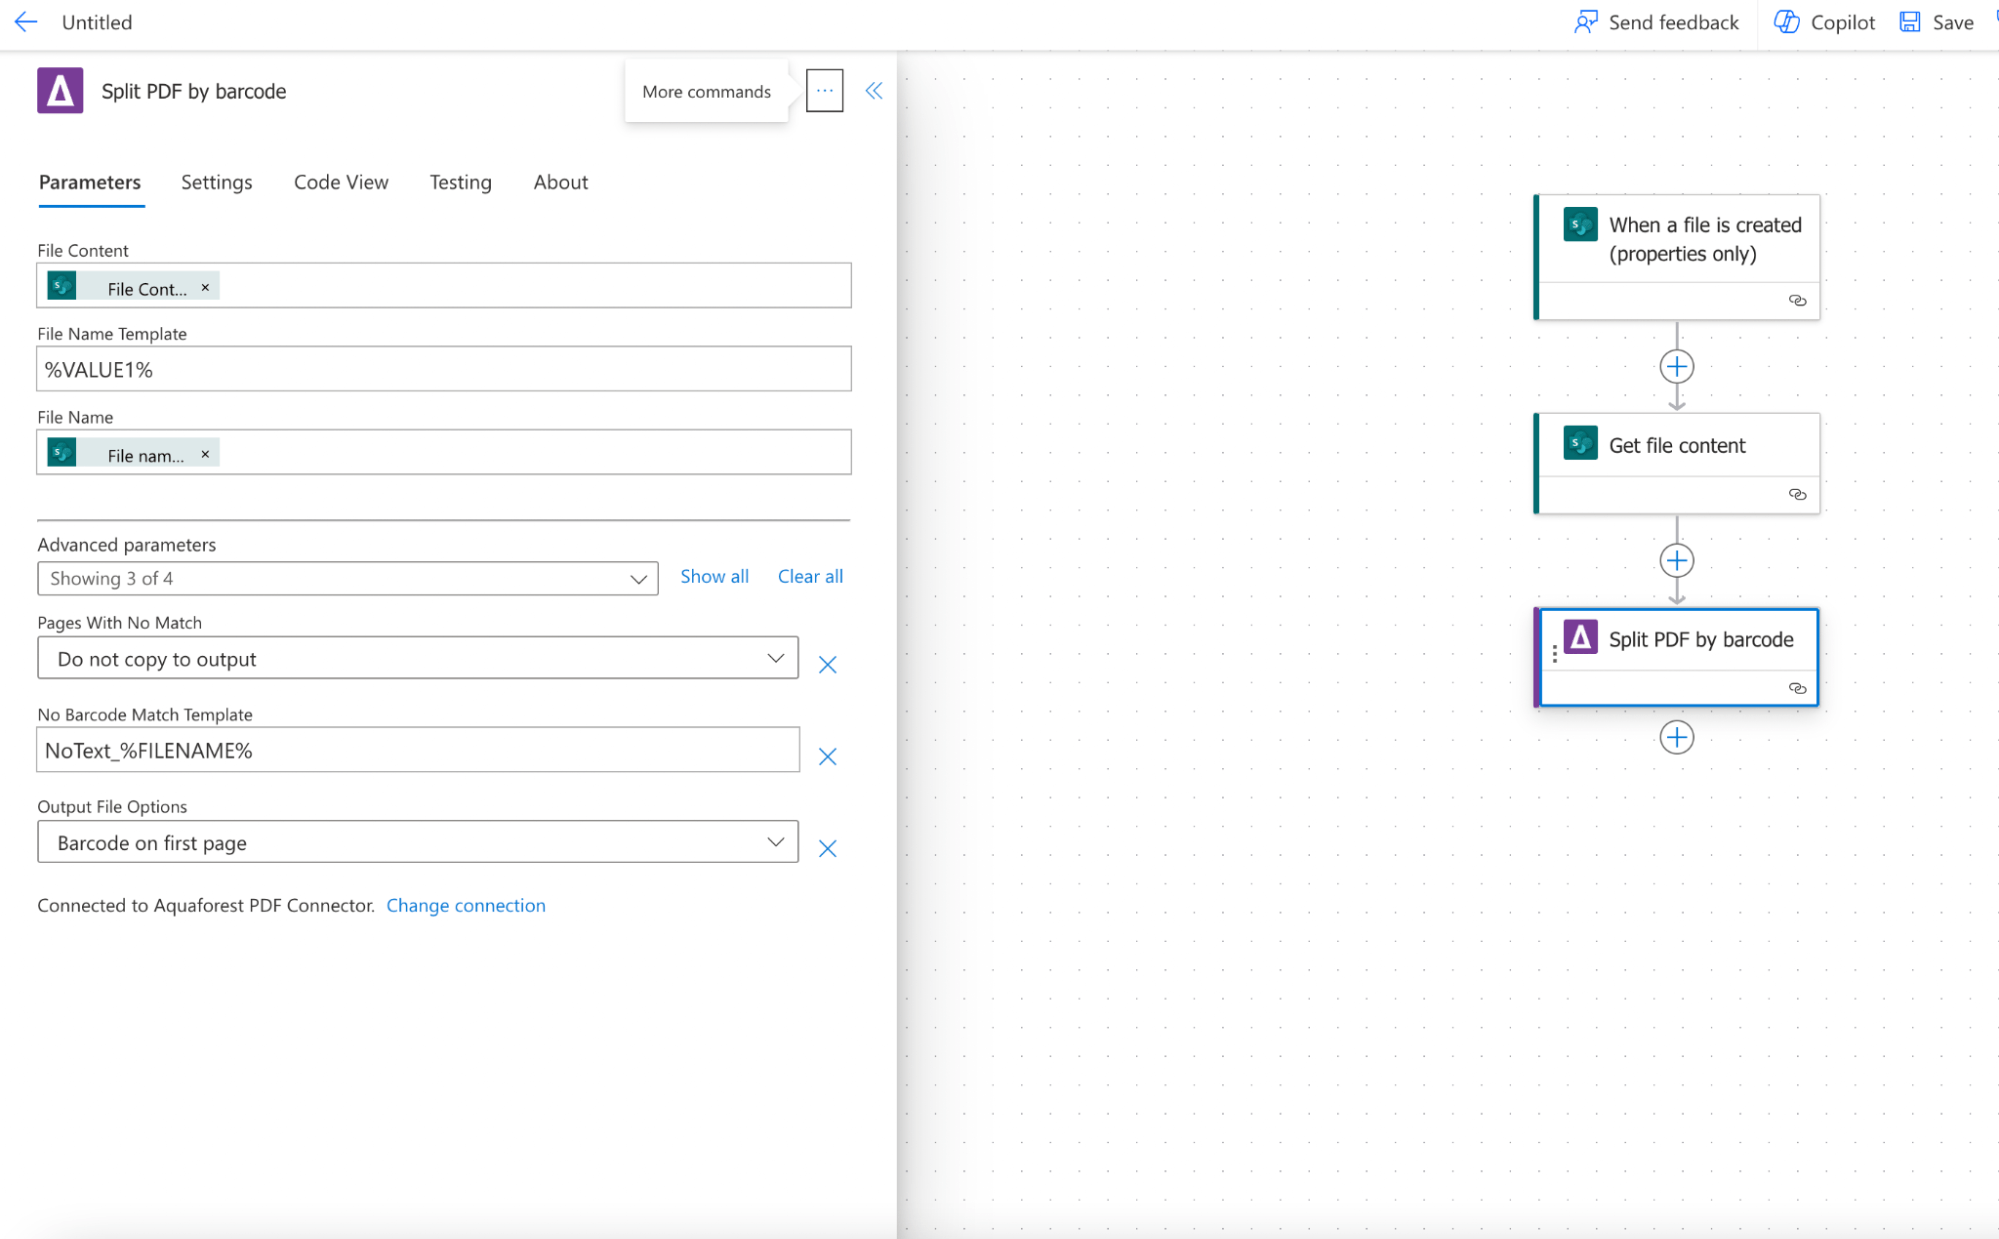
When you activate the connector and add an action, the next step would be to fill in the required fields. Enter the source file name, file content (base64 string), and file name template.
File Content: The content of the source file. Click on the thunder sign and type Get file content, then click Add. File Name Template: Template for the output text result if a barcode match is found. You can leave it as it is and the %VALUE1% will be replaced by the barcode values found dynamically.
File Name: Click on the thunder sign and choose “File name with extension”.
Step 3. Configure Optional Parameters.
Pages with no Match: Define the behavior for pages with no barcode value in the split section output. No Barcode Match Template: Template for the text to be returned if a barcode match is not found. Output File Options: Choose the location of the page with the barcode in the output files from the split operation.
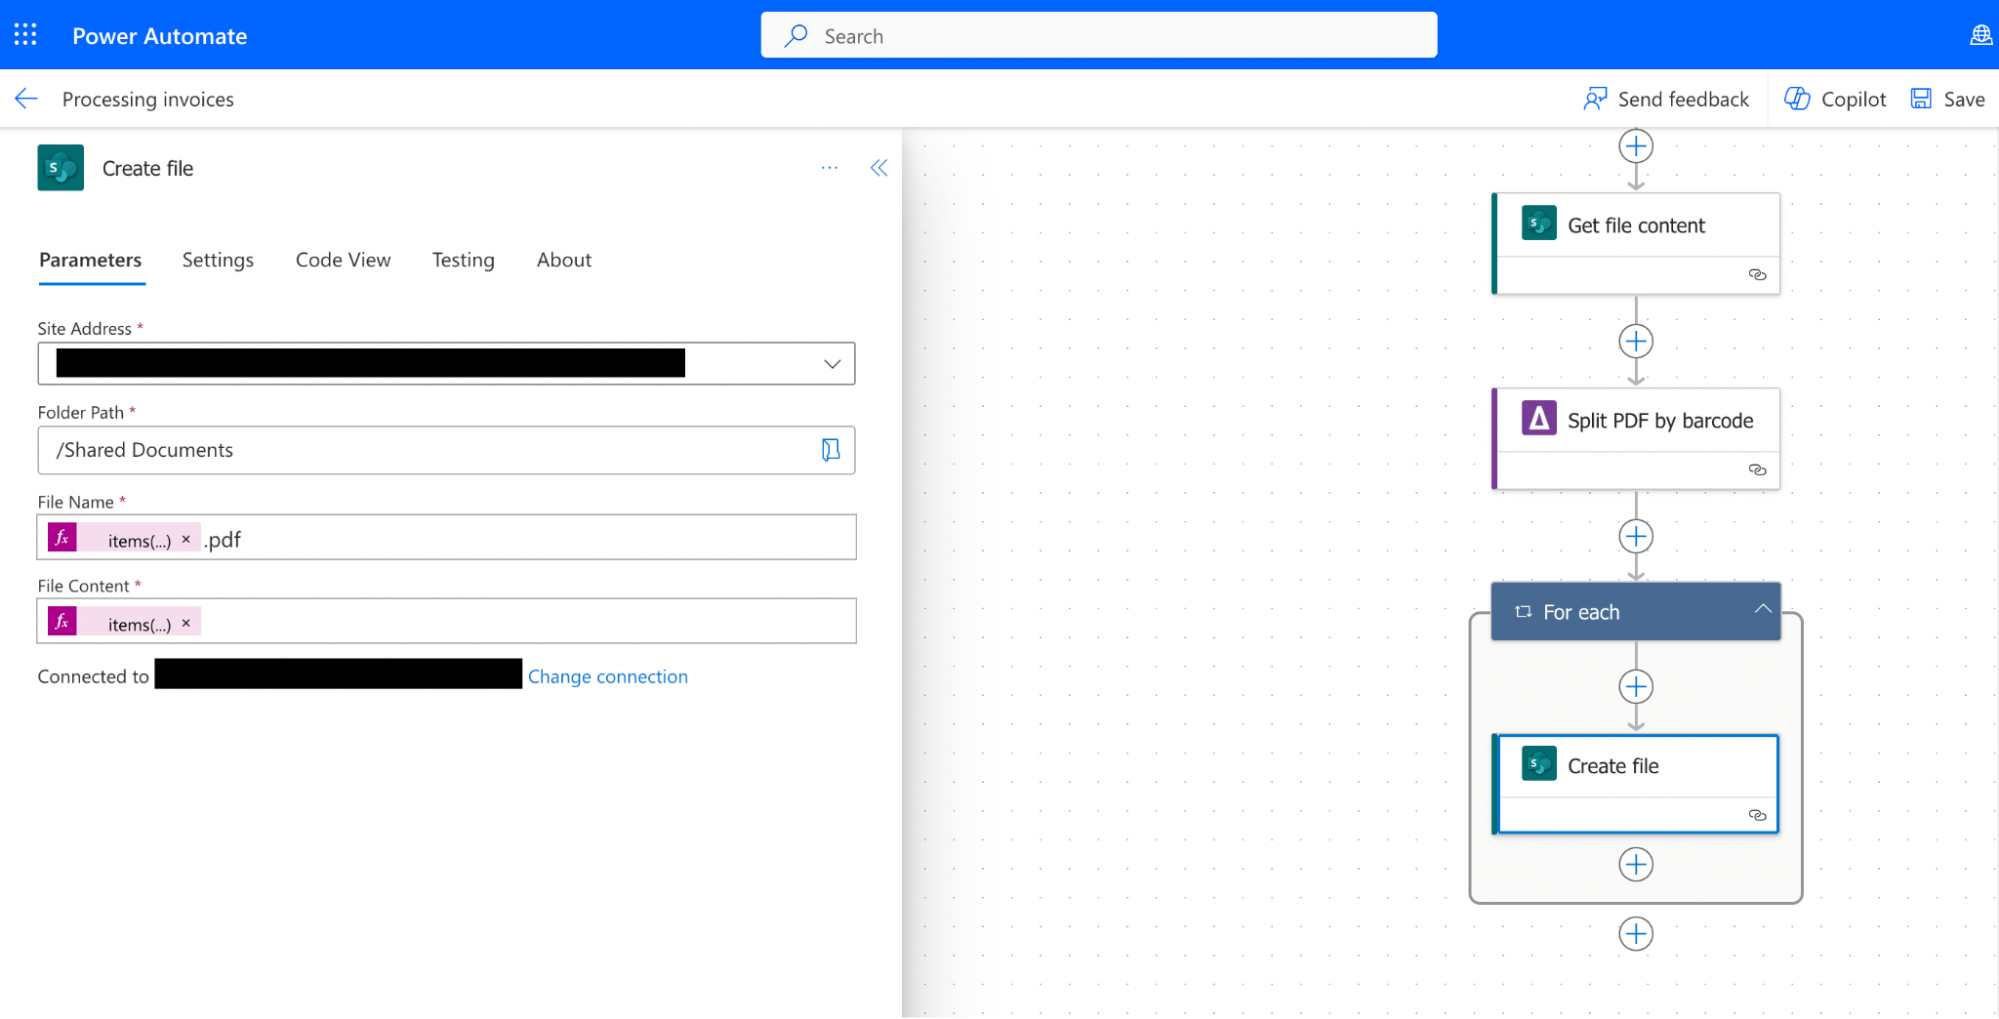
Step 4. Create file action.
Add the create file action and configure following the details below:
Site address: The URL of your SharePoint site.
Folder path: The location of your SharePoint library where the input file is stored.
File name: Choose “Split Output Files (file name)” and add “.pdf”. The output file name contains the barcode file in it.
File content: Click on the thunder sign to open Dynamic content. Click on See More to show all the output parameters and then click on Split Output Files (file content) and confirm by clicking on the Add button.
Split Output Files is the Array of Split Files with their corresponding file names.
You can also check other output parameters:
Page Range: The page range containing the page numbers of the split operation.
Is Successful: A boolean value specifying if the operation was successful or not.
License Info: Information about your API subscription key, it contains:
LicenseType CallsRemaining CallsMade
Error Message: Contains the Error message returned by the operation if any exist.
Step 5. Execute the Action.
Click on the Save button and run the Power Automate workflow to execute the “Split PDF by Barcode” action.
Step 5. Review Output.
Check the output for accurately separated invoices with customized file names based on barcode values.
Conclusion
By incorporating the Aquaforest PDF Connector‘s “Split PDF by Barcode” action into your Power Automate workflows, you can significantly enhance the efficiency and accuracy of invoice processing. This user guide provides a comprehensive walkthrough of the action, empowering users to streamline accounts payable processes and reduce manual effort.
Author
Marija Trpkovic
Product Marketing Manager
Marija is a product marketing manager who likes to launch new products and features and target the right people with them. Outside of work, she likes spending time outdoors with her family and dogs.
In the dynamic world of logistics and transportation, precision and efficiency in package tracking and shipment processing are paramount. The Aquaforest PDF Connector for…
https://www.youtube.com/embed/5F1j0jvkhYw?si=r5s4U2RFdAQPkrkv Retailers face the constant challenge of managing diverse inventories efficiently. Barcode scanning has become a cornerstone in this pursuit, enabling quick and accurate…
https://www.youtube.com/embed/mohWLTVnYE8?si=bi0dvW7TdzAvT9Qo In the healthcare industry, the efficient digitization of patient records is crucial for providing timely and accurate care. This user guide focuses on…